LS-DYNA User Guide
Ls-Dyna is a general-purpose multi-physics simulation software package. It was originated from DYNA3D, developed by John Hallquist at the Lawrence Livermore National Laboratory in 1976. The software was commercialized as LS-Dyna in 1988 by Livermore Software Technology Corporation (LSTC).
The main Ls-Dyna capabilities are:
- 2D and 3D;
- Nonlinear dynamics (implicit and explicit solvers);
- Static and quasi-static analysis;
- Thermal analysis and electromagnetic analysis;
- Computational fluid dynamics:
- Incompressible and compressible solver;
- Fluid-structure interactions;
- Smoothed-particle hydrodynamics;
- Geotechnical and soil-structure interactions;
- Contact algorithms;
- Large library of elements (shell, discrete, solid, etc).
Ls-Dyna on DesignSafe
In the Workspace are available the following apps:
- LS-PrePost: Pre-processing and post-processing of models (Workspace > Simulation >LS-DYNA> LS-Pre/Post);
- LS-Dyna: Actual solver (version 9.1.0) – serial and parallel versions (after activation - Workspace > My Apps > LS-DYNA).
Activate Ls-Dyna on DesignSafe
DesignSafe (through TACC) has negotiated with LSTC to allow LS-DYNA access on TACC systems for academic research. Users can submit a ticket (https://www.designsafe-ci.org/help/new-ticket/) requesting LS-DYNA access and are granted access upon verification with LSTC that they have an existing academic departmental license or that you acquire such license.
A Request Activation button is also available in Workspace > Simulation > LS-DYNA:
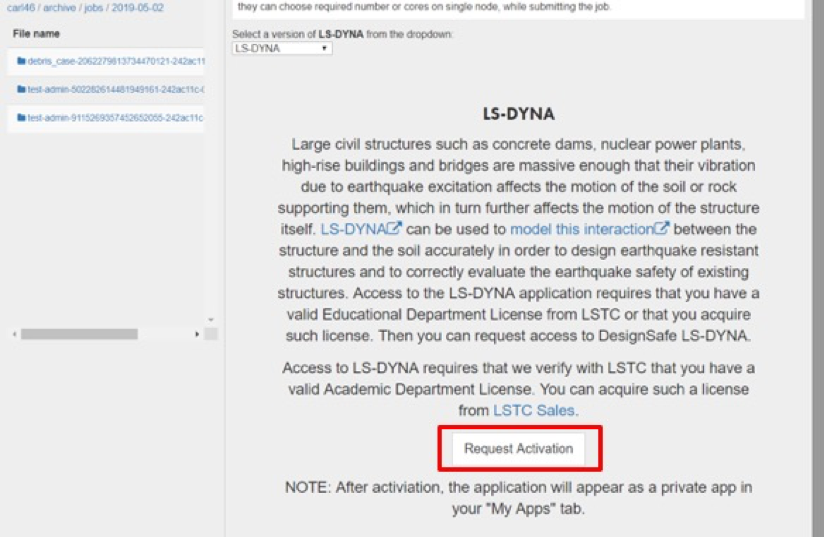
Once activated, Ls-Dyna will appear in Workspace > My Apps tab.
How to launch LS-Dyna
Examples in this guide:
- Launching LS-Pre/Post to generate or visualize model via DesignSafe web portal;
- Launching a single job via DesignSafe web portal;
- Launching batch of jobs via DesignSafe web portal;
- Launching batch of jobs via Command Line Interface.
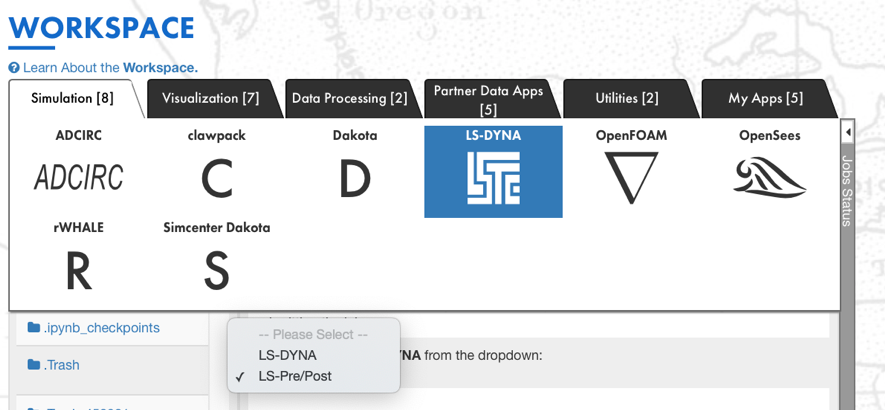
Launching LS-Pre/Post
- Select the LS-Pre/Post app from the drop-drown menu at (Workspace > Simulation > LS-DYNA):
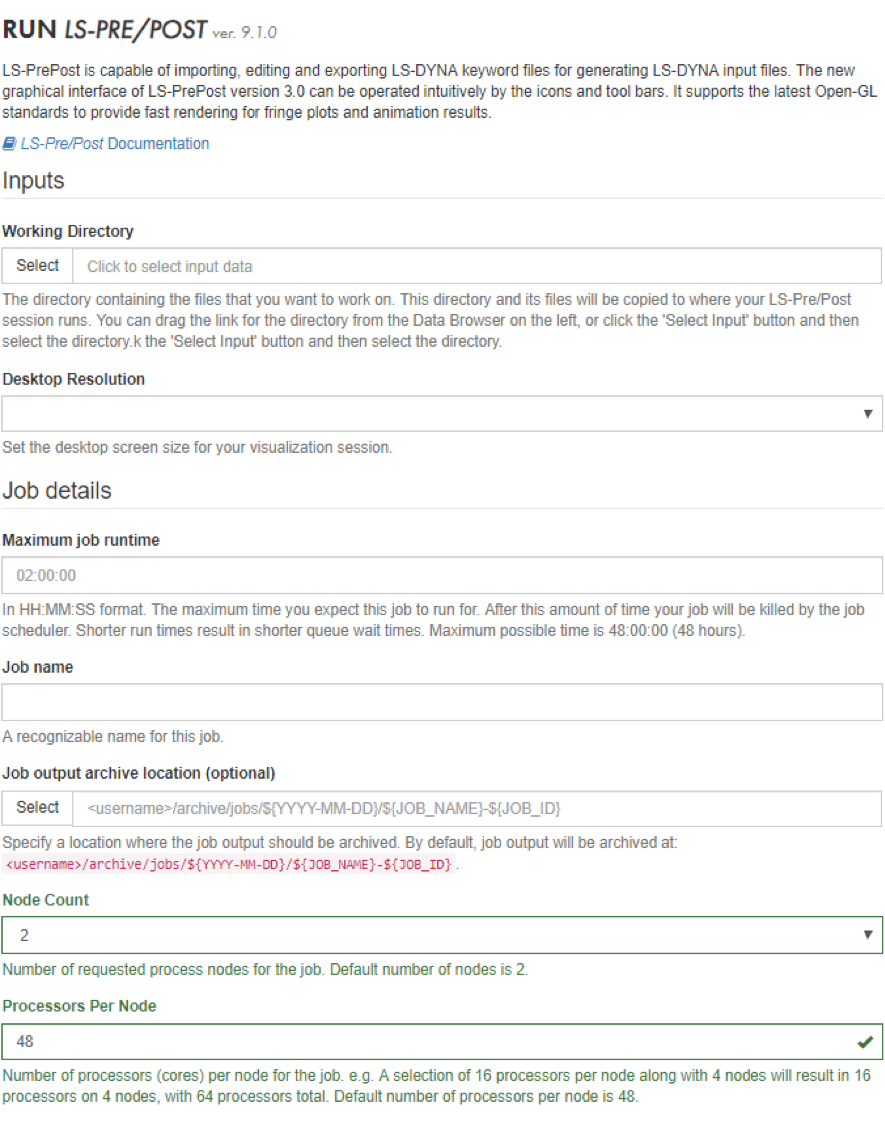
- Fill the form with the following information:
- Working directory: that contains the files that you want to work on;
- Desktop resolution: select the desktop screen size for the visualization;
- Maximum Job runtime: The maximum time you expect this job to run for. Note that after this amount of time your job will be killed by the job scheduler;
- Job name;
- Job output archive location (optional): location where the job output should be archived;
- Node Count: Number of requested process nodes for the job;
- Processors per Node: numbers of cores per node for the job. The total number of cores used is equal to NodeCount x ProcessorsPerNode.
- Click on Run;
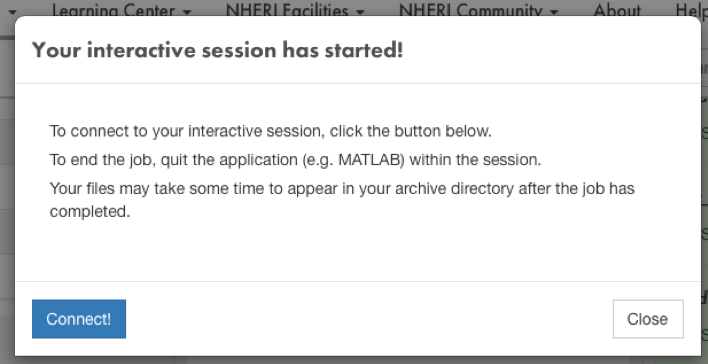
- Once ready a new window will pop-up.
- Click on Connect! and start using LS-Dyna Pre/Post.
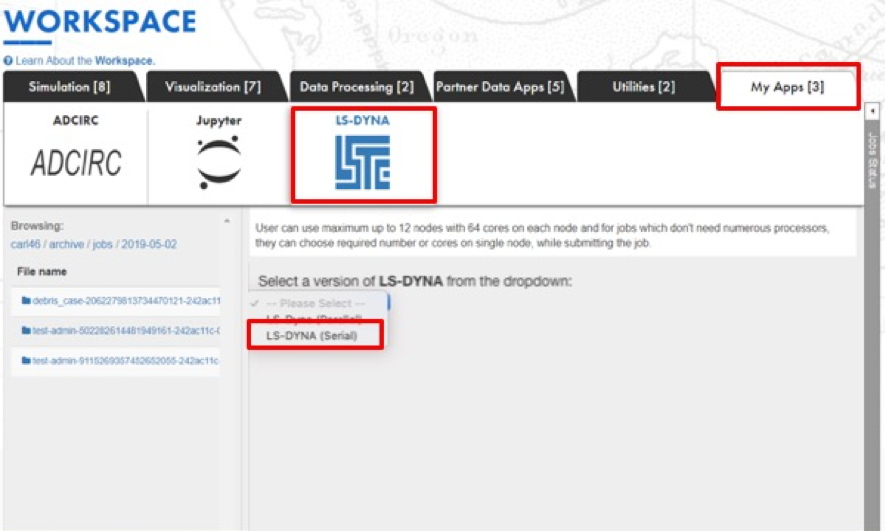
Launching a single job via DesignSafe web portal
- Select LS-DYNA (Serial) from the LS-DYNA app in (Workspace > My Apps > LS-DYNA):
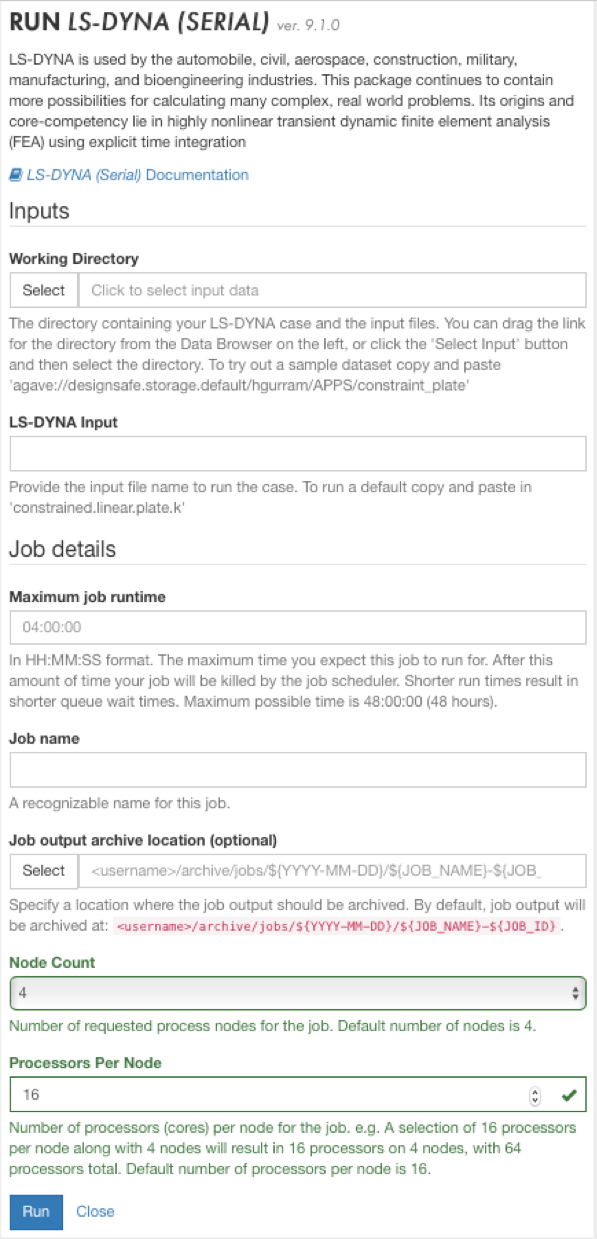
- Fill the form with the following information:
- Working directory: that contains the files that you want to work on;
- LS-DYNA Input: provide the input file name;
- Maximum Job runtime: The maximum time you expect this job to run for. Note that after this amount of time your job will be killed by the job scheduler;
- Job name;
- Job output archive location (optional): location where the job output should be archived;
- Node Count: Number of requested process nodes for the job;
- Processors per Node: numbers of cores per node for the job. The total number of cores used is equal to NodeCount x ProcessorsPerNode;
- Click on Run.
- Follow the Job Status on the right tab.
- When the analysis is completed two options available:
- Launching LS-PrePost again to visualize/extract results;
- Transfer output files via Globus (see details at: https://www.designsafe-ci.org/rw/user-guides/globus-data-transfer-guide/).
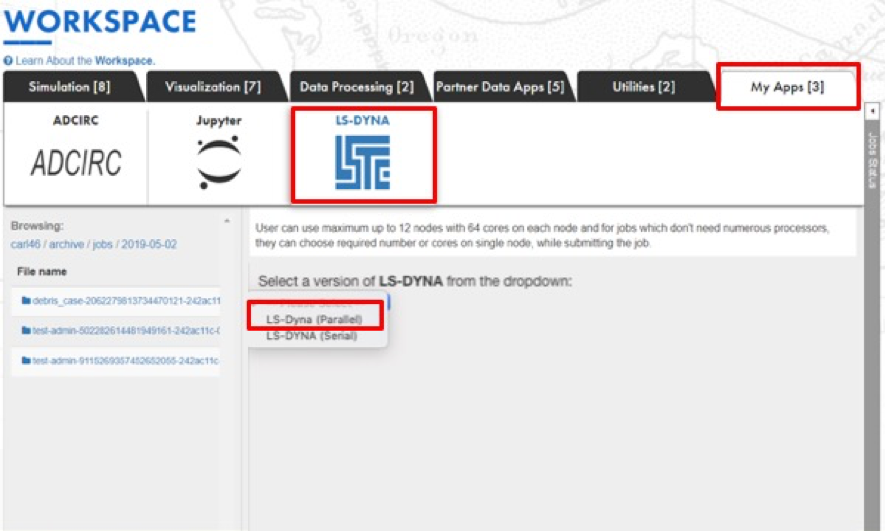
Launching batch of jobs via DesignSafe web portal
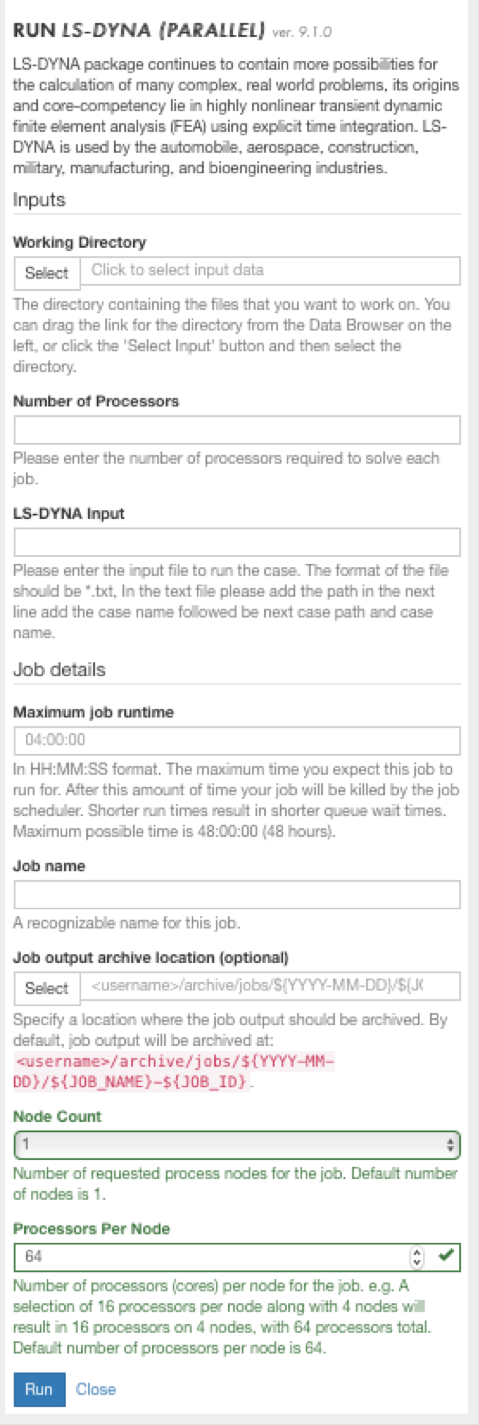
- Select LS-DYNA (Parallel) from the LS-DYNA app in (Workspace > My Apps > LS-DYNA):
- Fill the form with the following information:
- Working directory: that contains the files that you want to work on;
- Number of Processors: insert the number of processors required to solve each job;
- LS-DYNA Input: provide the input file name. This file should be a text file that lists the names of all jobs to run. All jobs need to be in the same directory (see example file below);
- Maximum Job runtime: The maximum time you expect this job to run for. Note that after this amount of time your job will be killed by the job scheduler;
- Job name;
- Job output archive location (optional): location where the job output should be archived;
- Node Count: Number of requested process nodes for the batch of jobs;
- Processors per Node: numbers of cores per node for the batch of jobs. The total number of cores used is equal to NodeCount x ProcessorsPerNode;
- Click on Run;
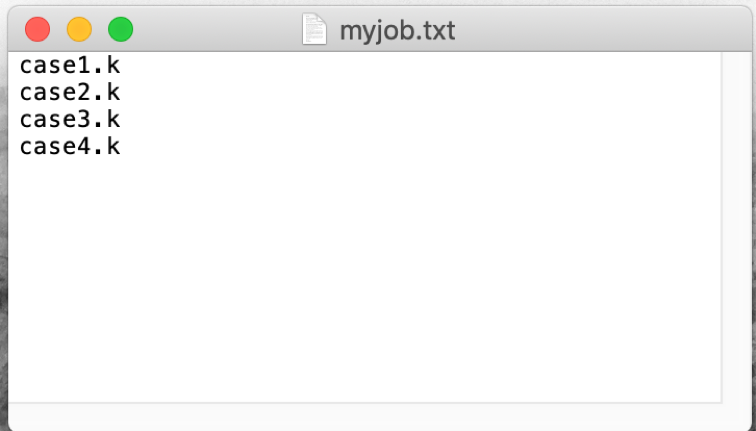
Example Ls-Dyna input file for parallel jobs.
- Follow the Job Status on the right tab.
- When the analysis is completed two options available:
- Launching LS-PrePost again to visualize/extract results;
- Transfer output files via Globus (see details at: https://www.designsafe-ci.org/rw/user-guides/globus-data-transfer-guide/).
Launching batch of jobs via Command Line Interface (CLI)
- Connect to Frontera using SSH Client. See TACC's [Data Transfer & Management Guide](https://docs.tacc.utexas.edu/hpc/frontera/):
- Host name: frontera.tacc.utexas.edu;
- Username and Password should be the same ones as for DesignSafe.

- Transfer LS-Dyna k files to /scratch or /work directory on Frontera (via Globus);
- Generate 3 files:
- A batch file (launcherLs_Dyna.slurm) that contains all the information about the resources that you need for the parallel job and calls input files (see example file below);
- 2 python routines to launch pylauncher that is a python-based parametric job launcher:
- myparallellines.py: it generates a file with the list of the n jobs that you need to run (see example file below);
- This routine will generate a my_parallel_lines file (for n=4) (see example file below);
- myparallellines.py: it generates a file with the list of the n jobs that you need to run (see example file below);
- launcher_file.py: it calls the application that allows to submit all the jobs in parallel. The number of cores assigned to each job is specified in cores (34 in this example). The script will call the file generated by myparallellines.py script (see example file below);
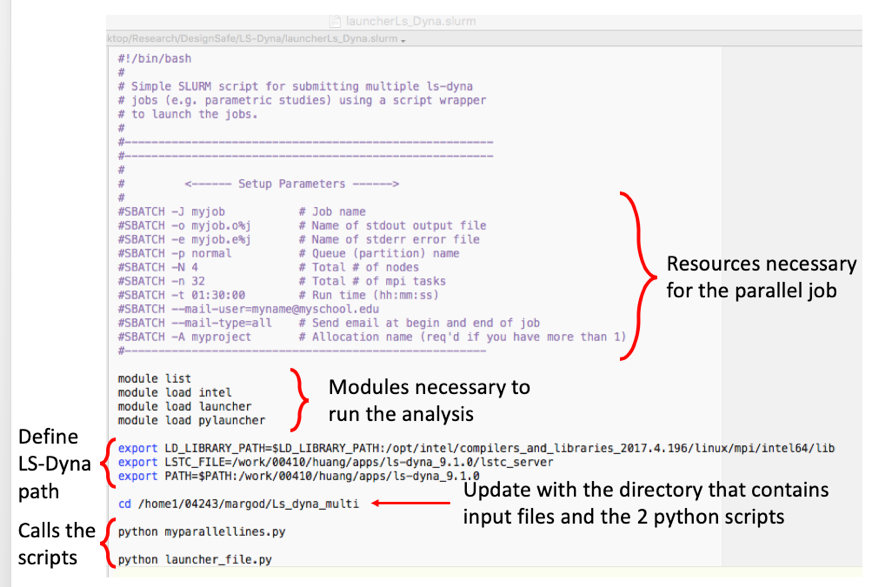
Example batch file for Ls-Dyna via CLI.

Example myprallellines.py routine.
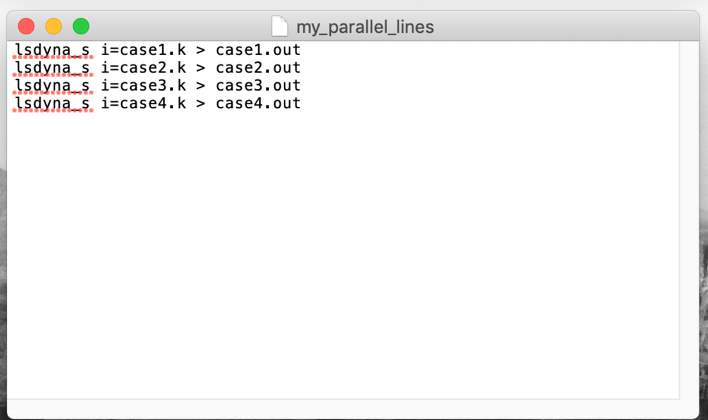
Example my_parallel_lines file.

Example launcher_file.py routine.
- Launch jobs using SSH client:
- cd directory_where_your_inputs_are
- sbatch launcherLs_Dyna.slurm (slurm file)
- squeue –u user_name (see status of job)
- Emails at begin and end of job will be sent to the email address provided in the batch file.
- Once the analysis is completed, output files can be transferred using Globus (or SCP client) and used LS-PrePost (or else) to visualize them.